
LINE setup guide
Connect a LINE Official Account
Prepare an official account, provider, and channel to use the LINE Messaging API.
Guide contents
Purpose of this guide: These steps prepare your account for the LINE Messaging API. Keep credentials such as channel access tokens secure and never share them with third parties.
Create a LINE Official Account
Open a LINE Official Account that connects your business with customers.
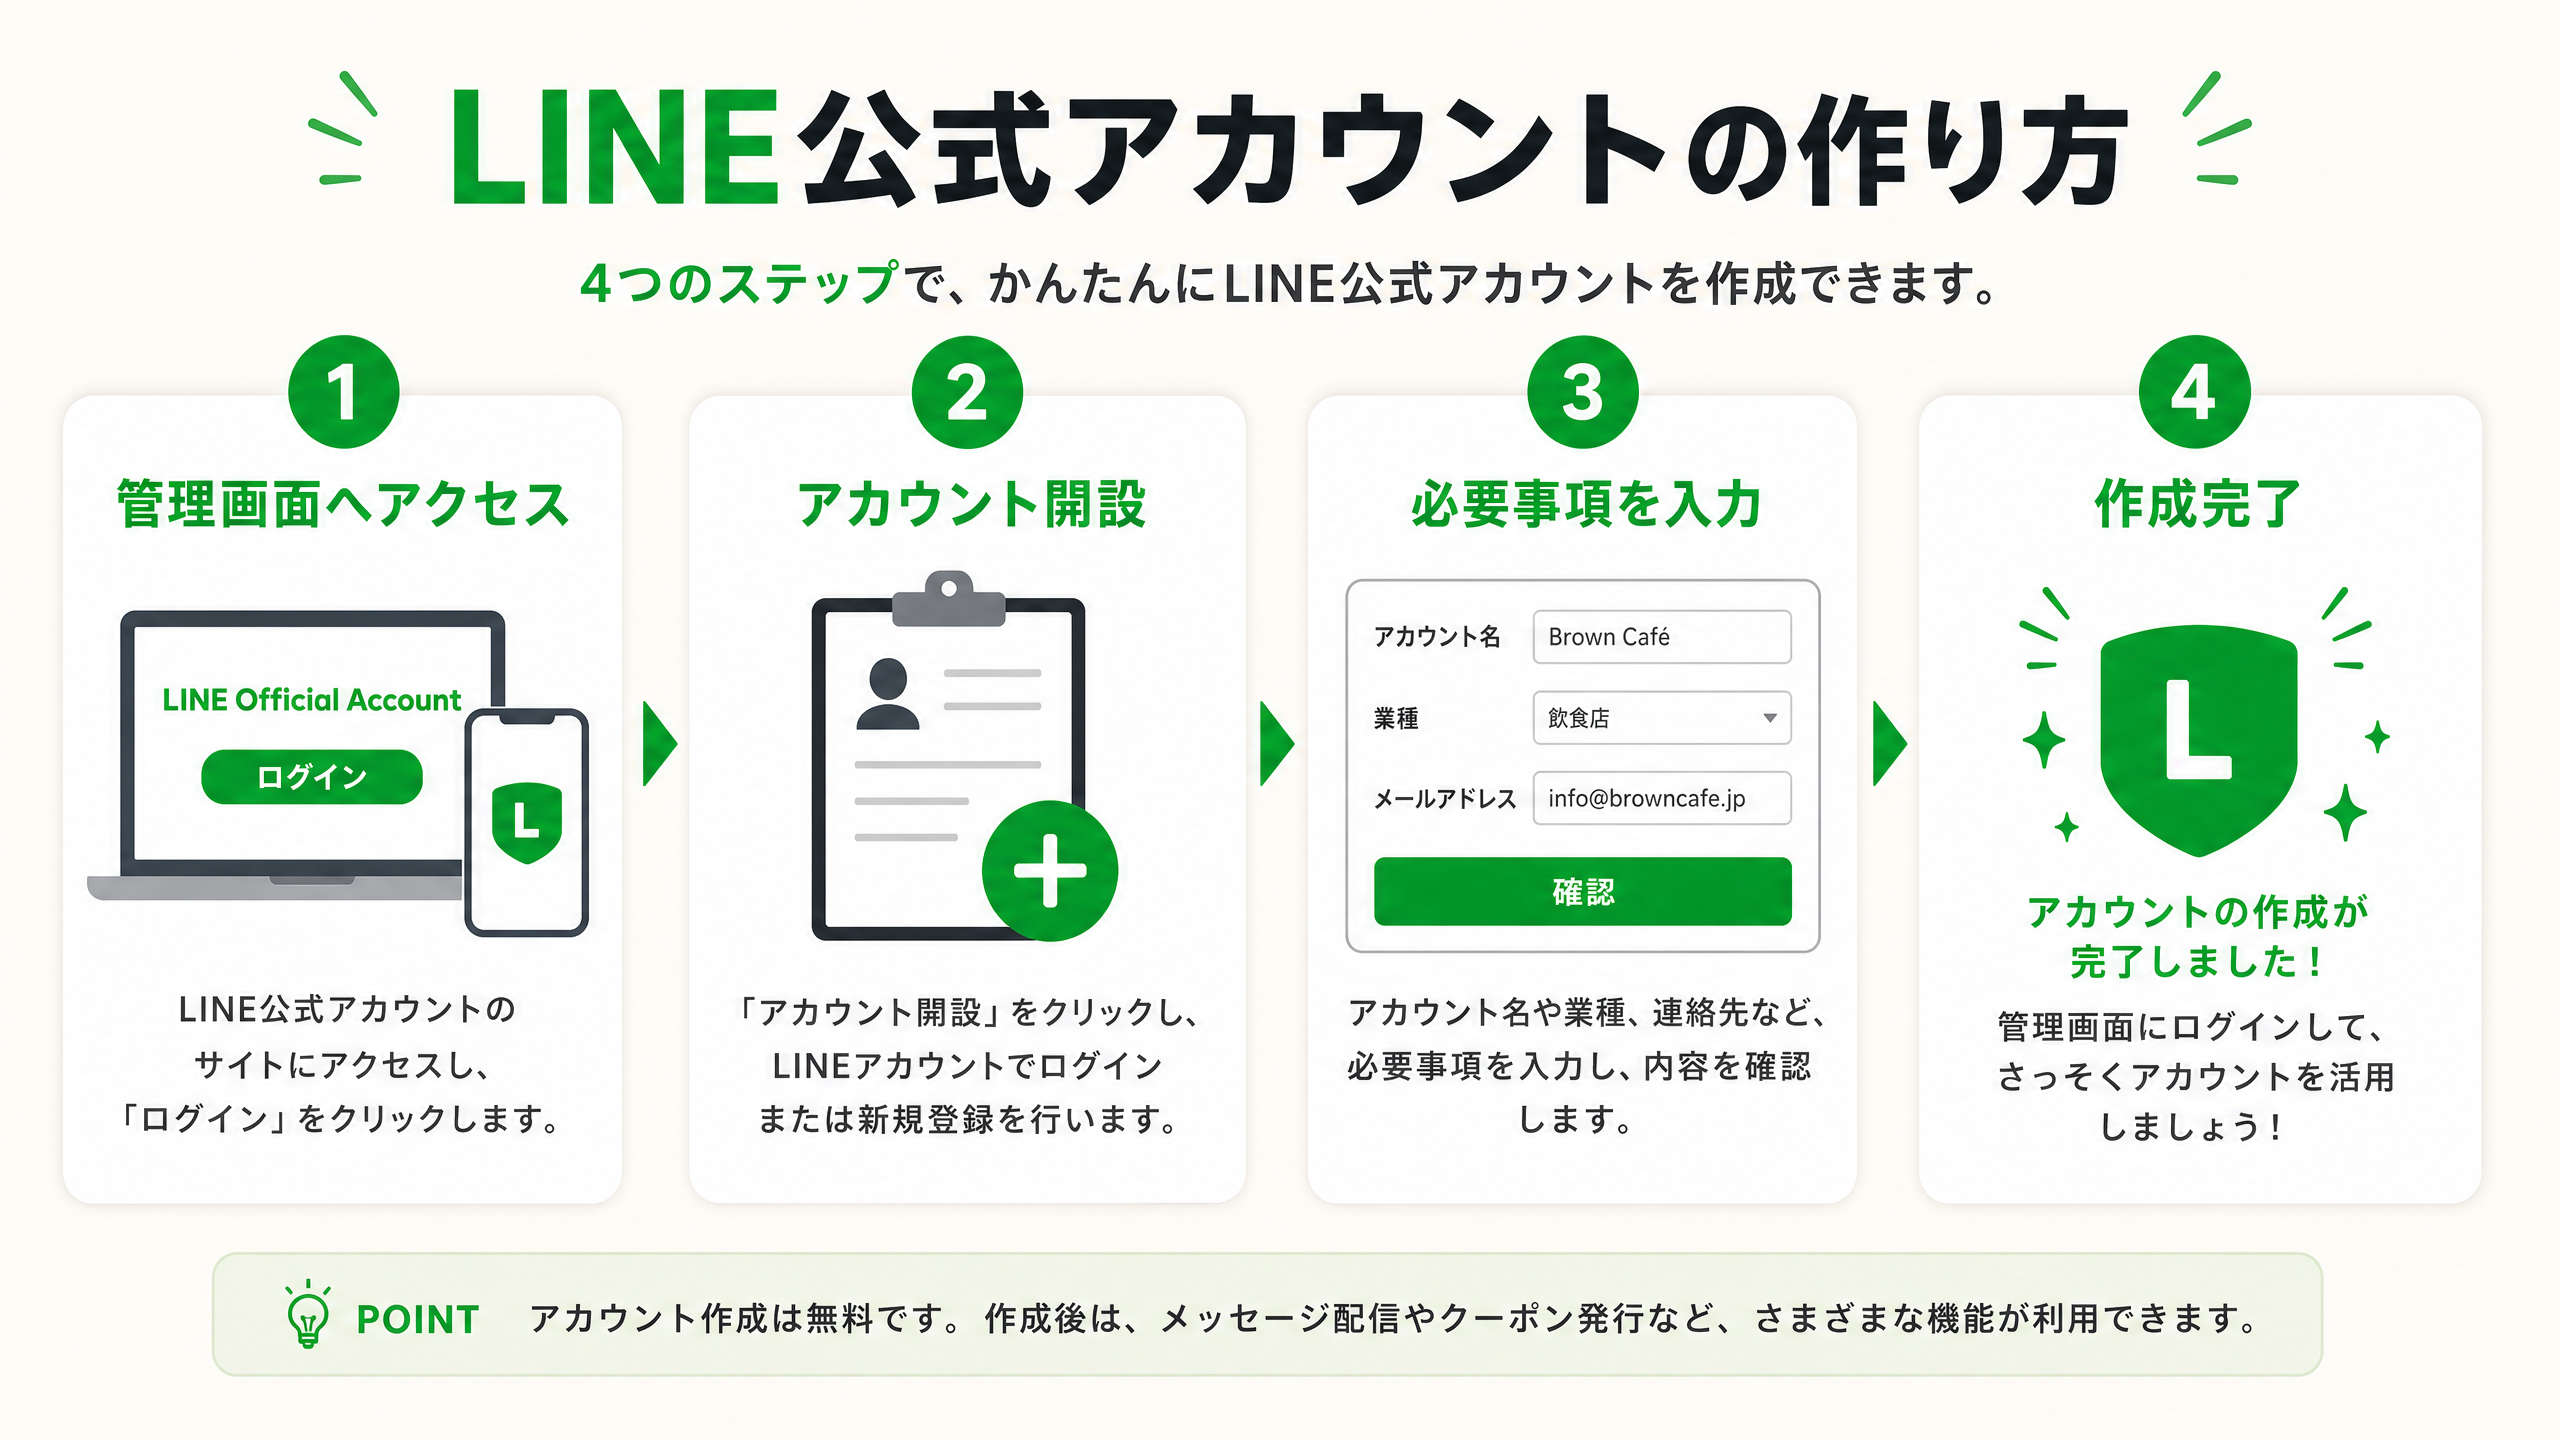 Open the image to enlarge
- Search for “LINE Official Account” in a web browser and open the official website.
- Select the free account creation button and sign in with a LINE account or business account.
- Enter the account name, such as your shop name, industry, email address, and other required information.
- Review the information and complete account creation.
Register with LINE Developers
Sign in to LINE Developers and create a developer profile to use the LINE Messaging API.
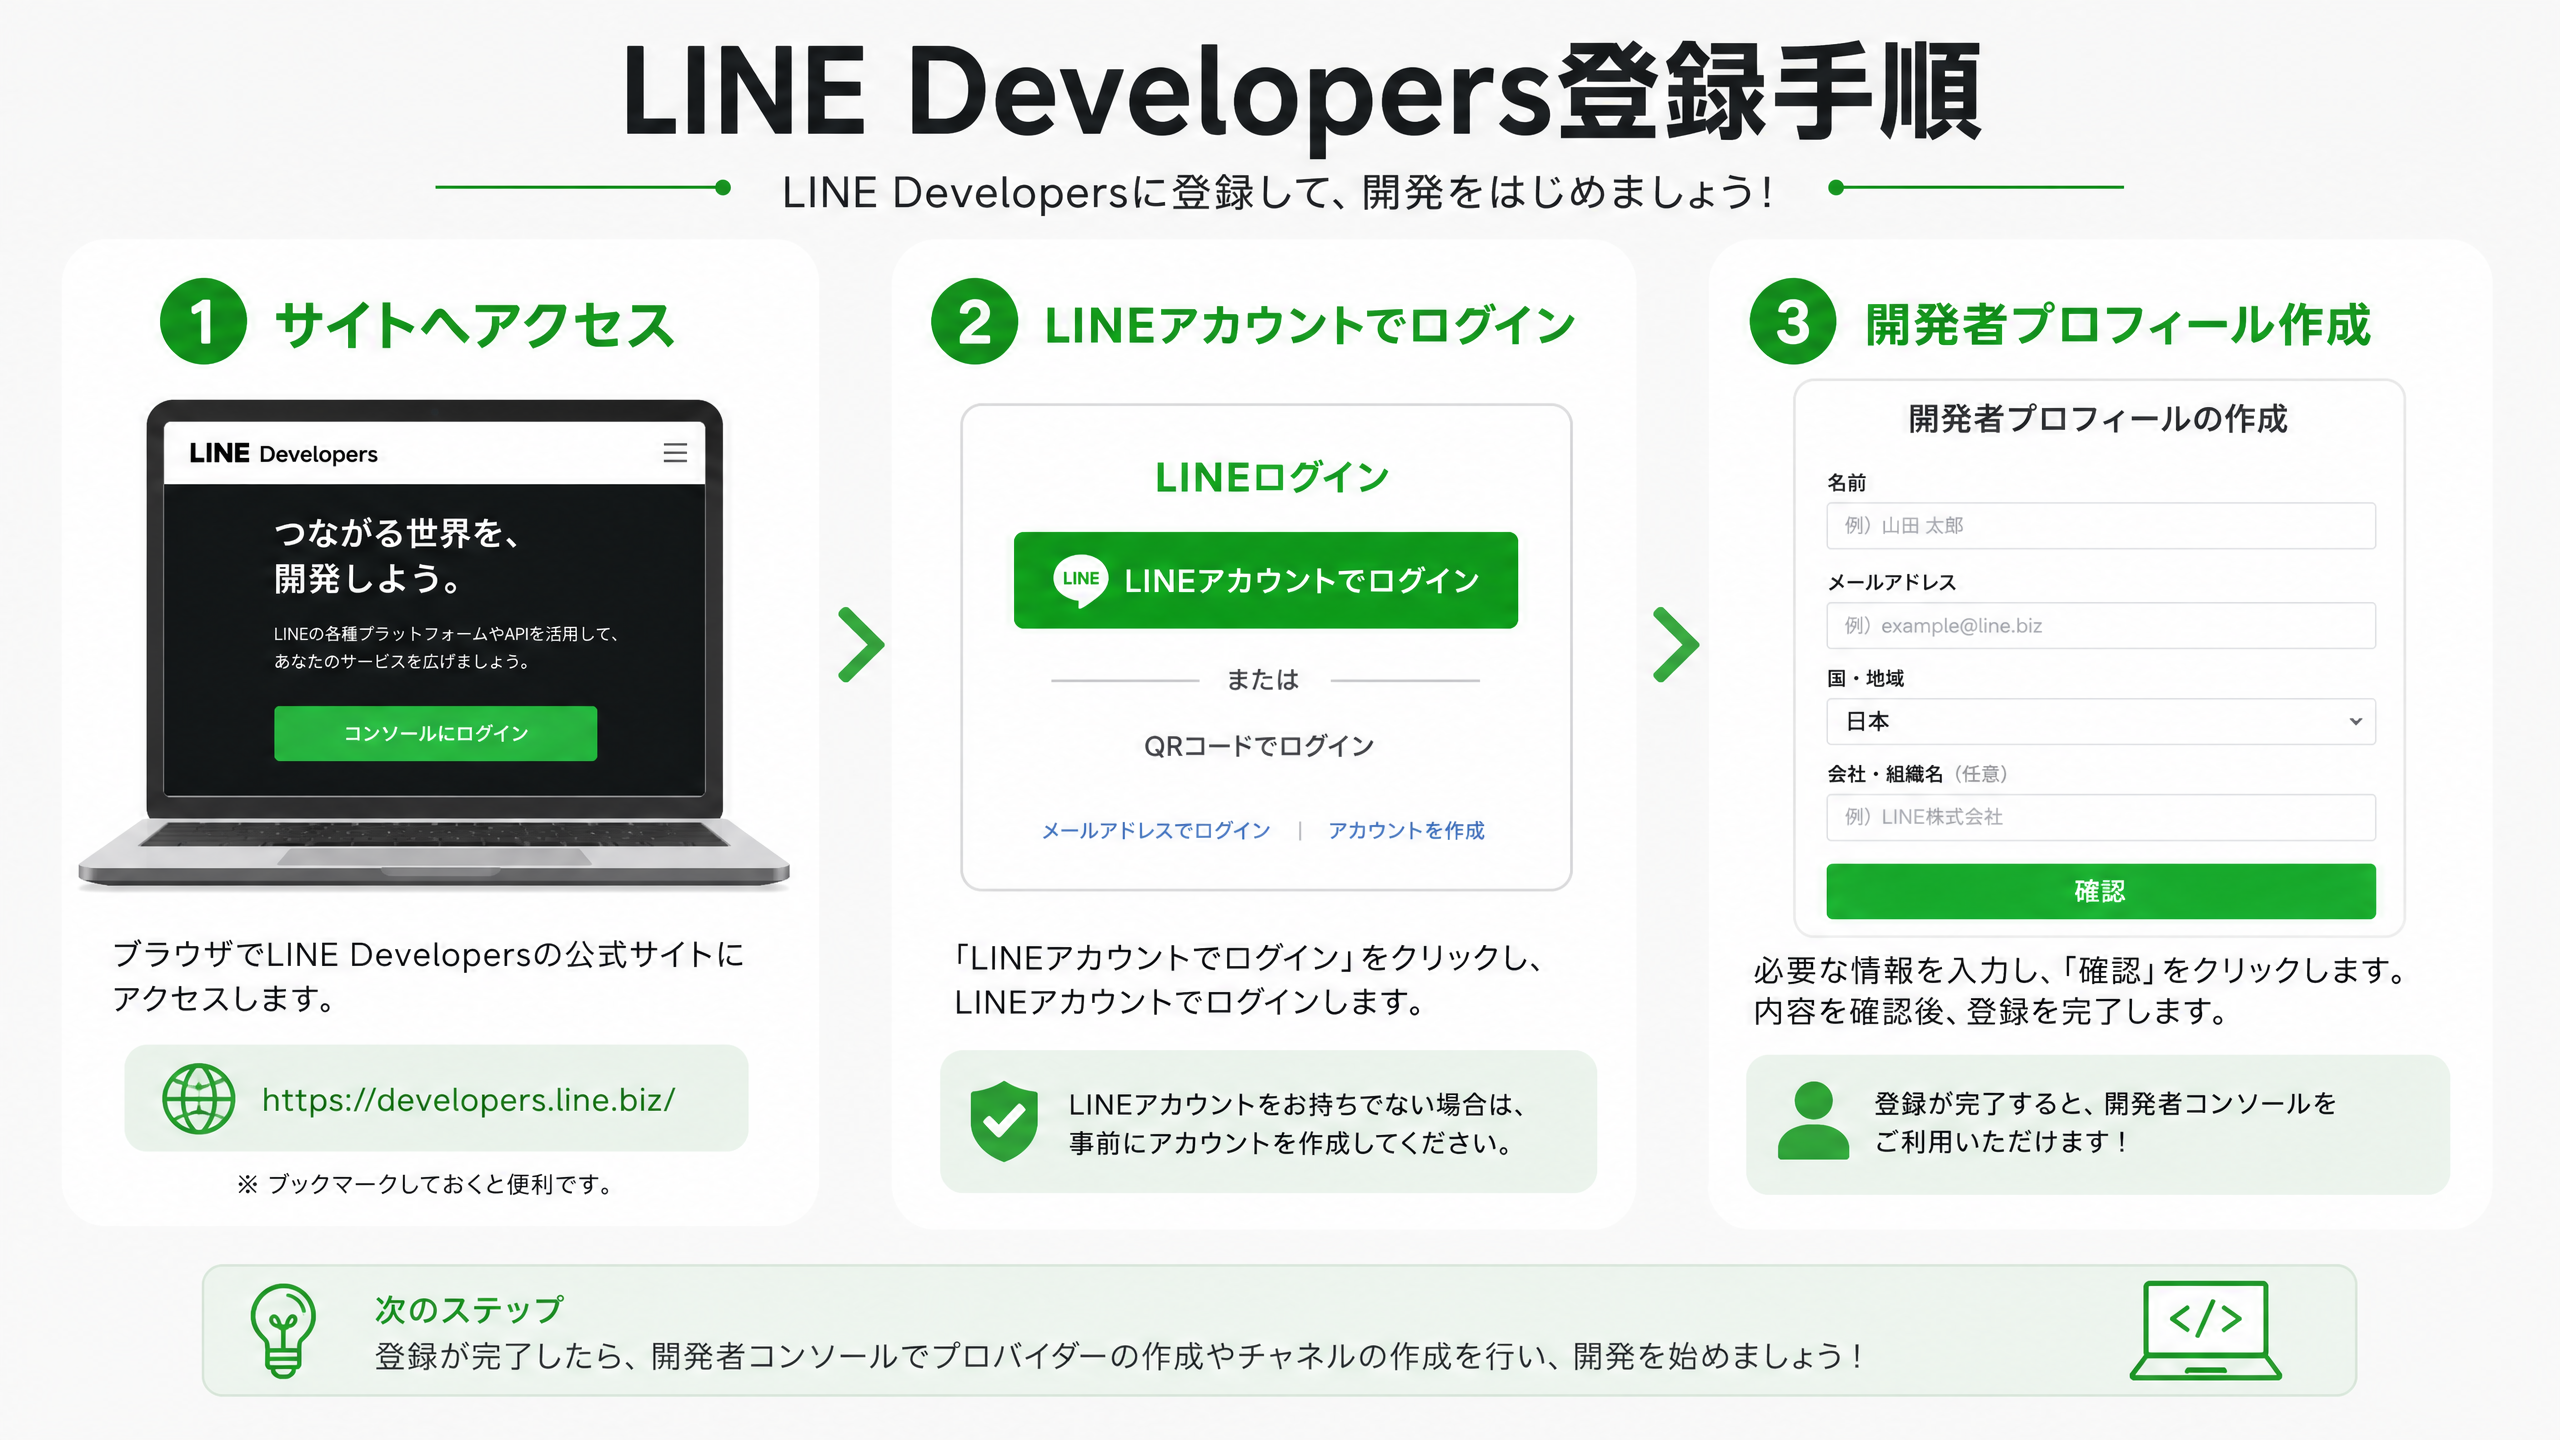 Open the image to enlarge
- Search for “LINE Developers” in a web browser and open the official website.
- Sign in with the LINE account used to create the LINE Official Account.
- If this is your first visit, enter your name and email address, agree to the terms, and create a developer profile.
Create a provider and channel
Create a provider and Messaging API channel in LINE Developers.
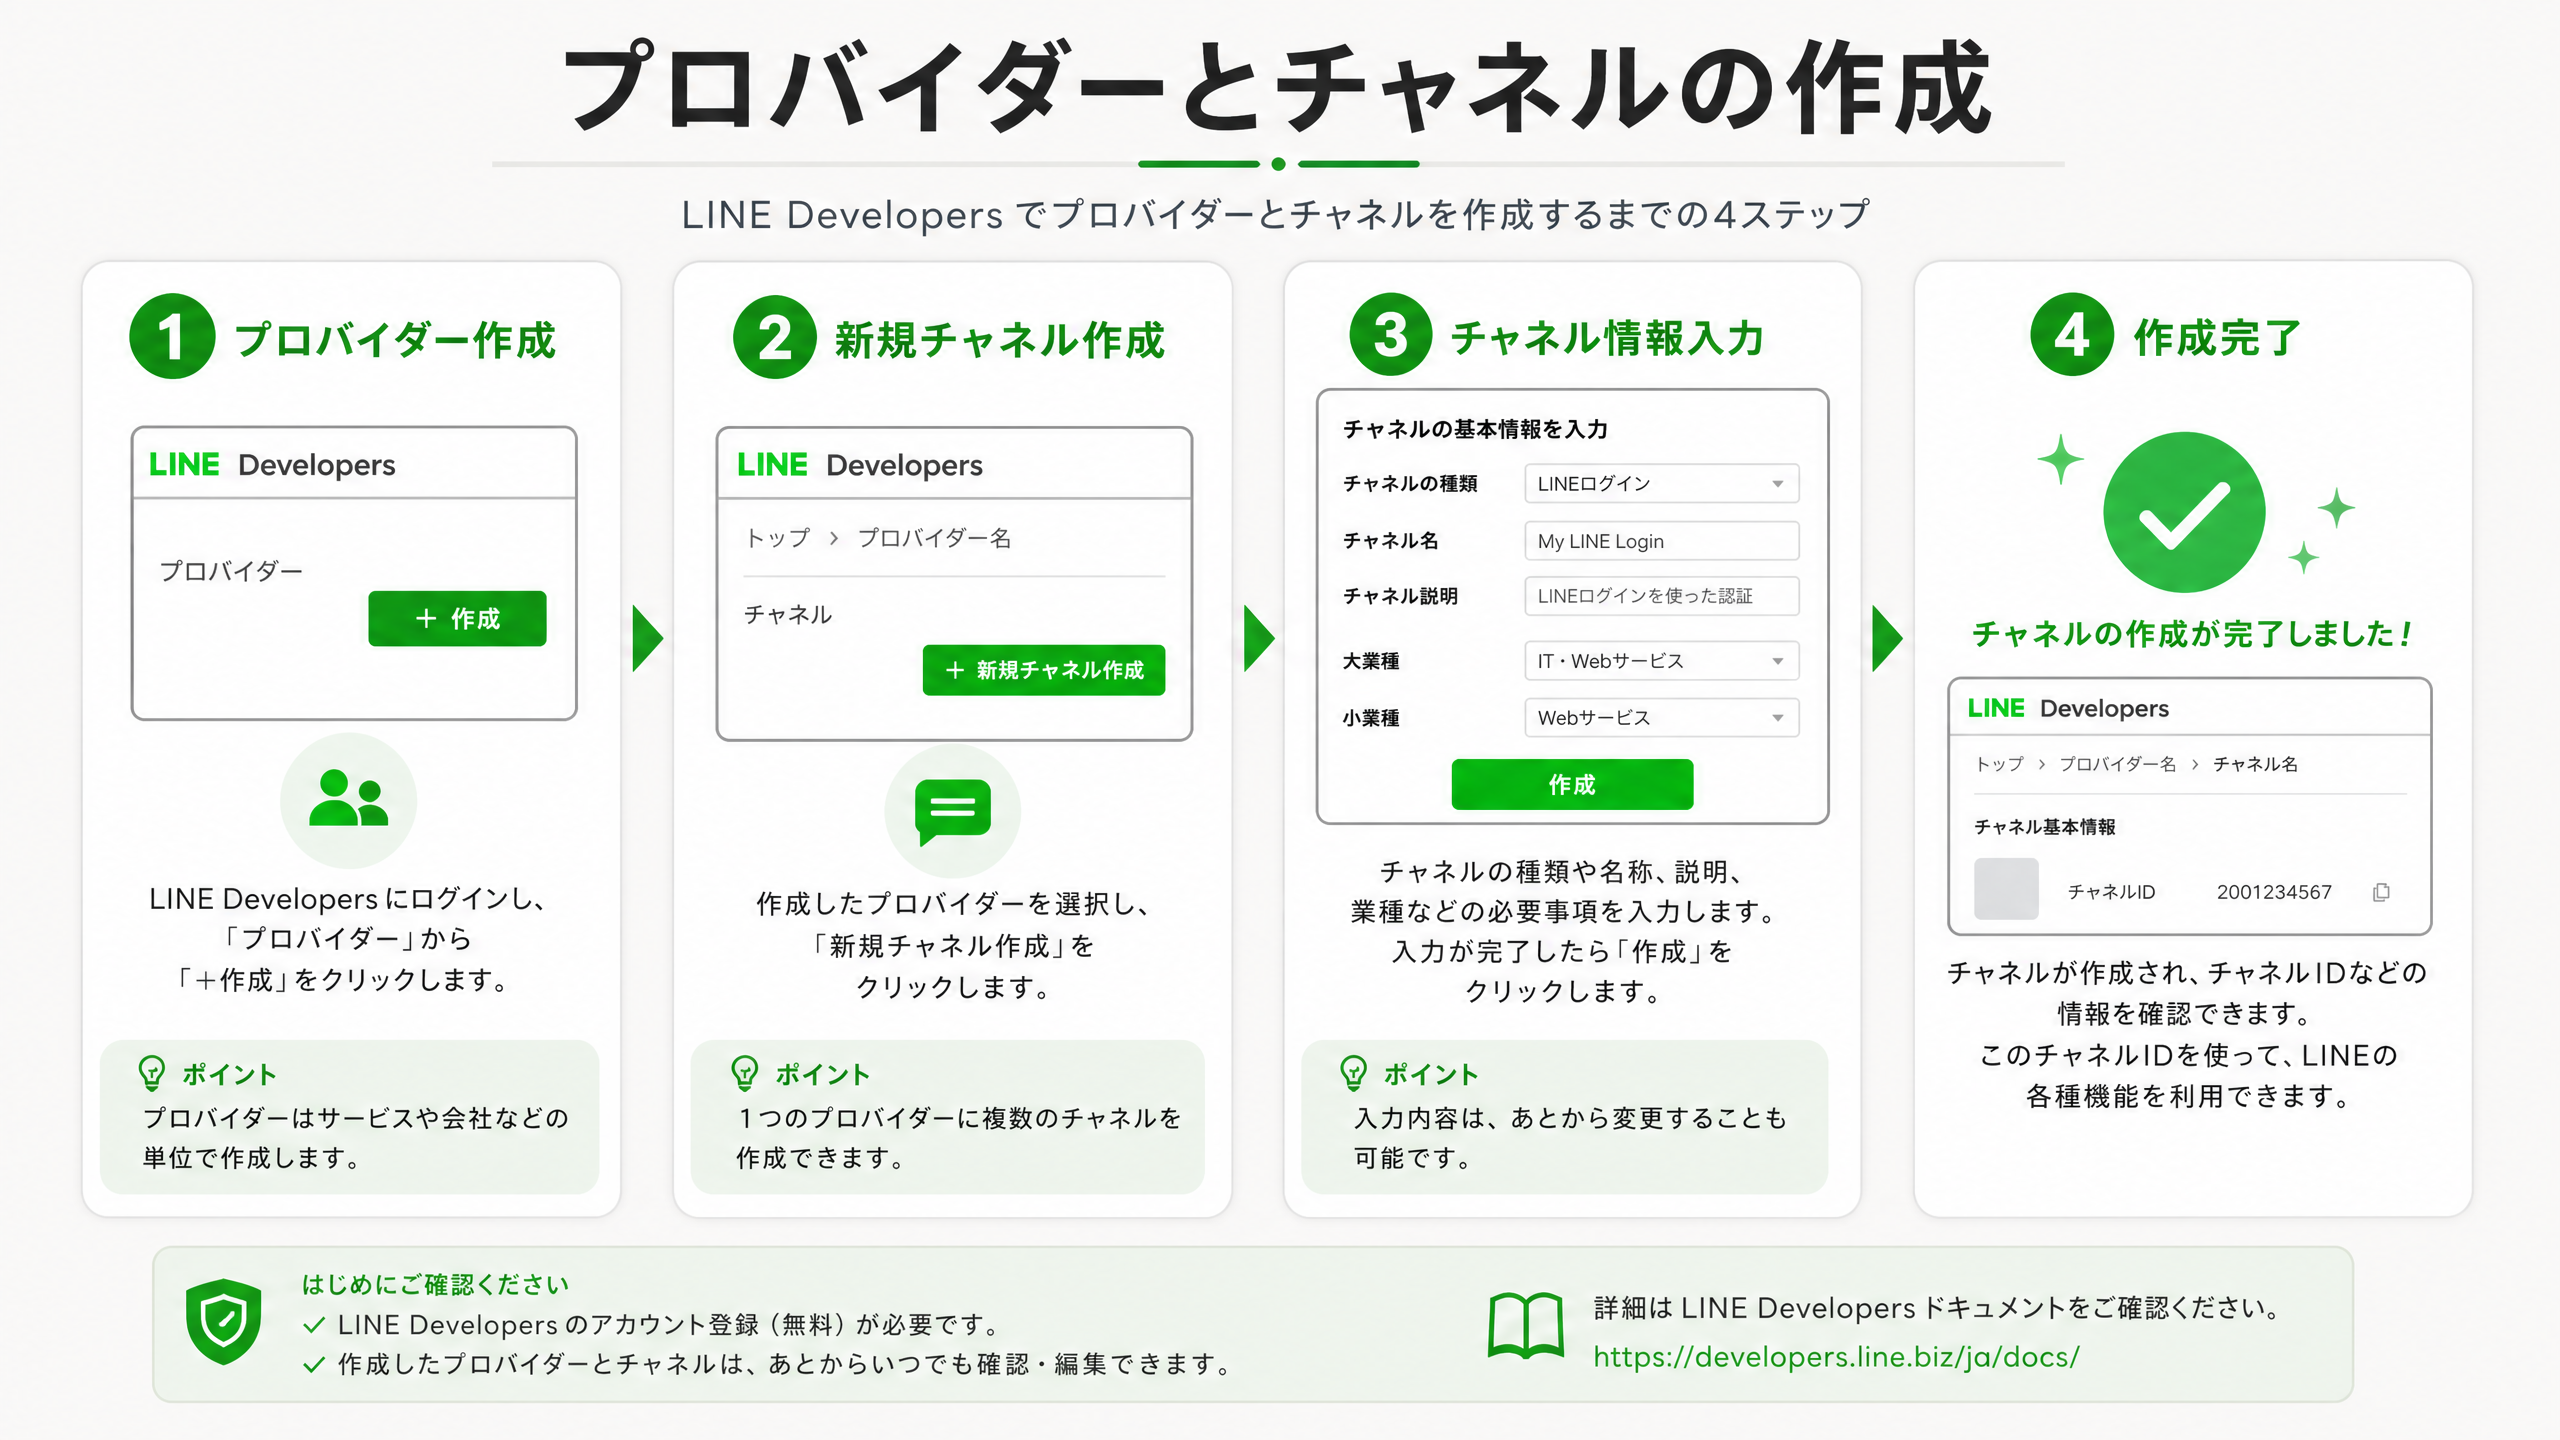 Open the image to enlarge
- In the Providers section of the LINE Developers Console, select “Create a new provider” and enter your company or service name.
- Select the provider, choose “Create a new channel,” and select “Messaging API” as the channel type.
- Enter the channel name, description, industry, and email address. Privacy Policy and Terms URLs can also be added later.
- Review the information and create the channel.
Enable and connect the Messaging API
Enable the Messaging API for the channel and confirm the information required for connection.
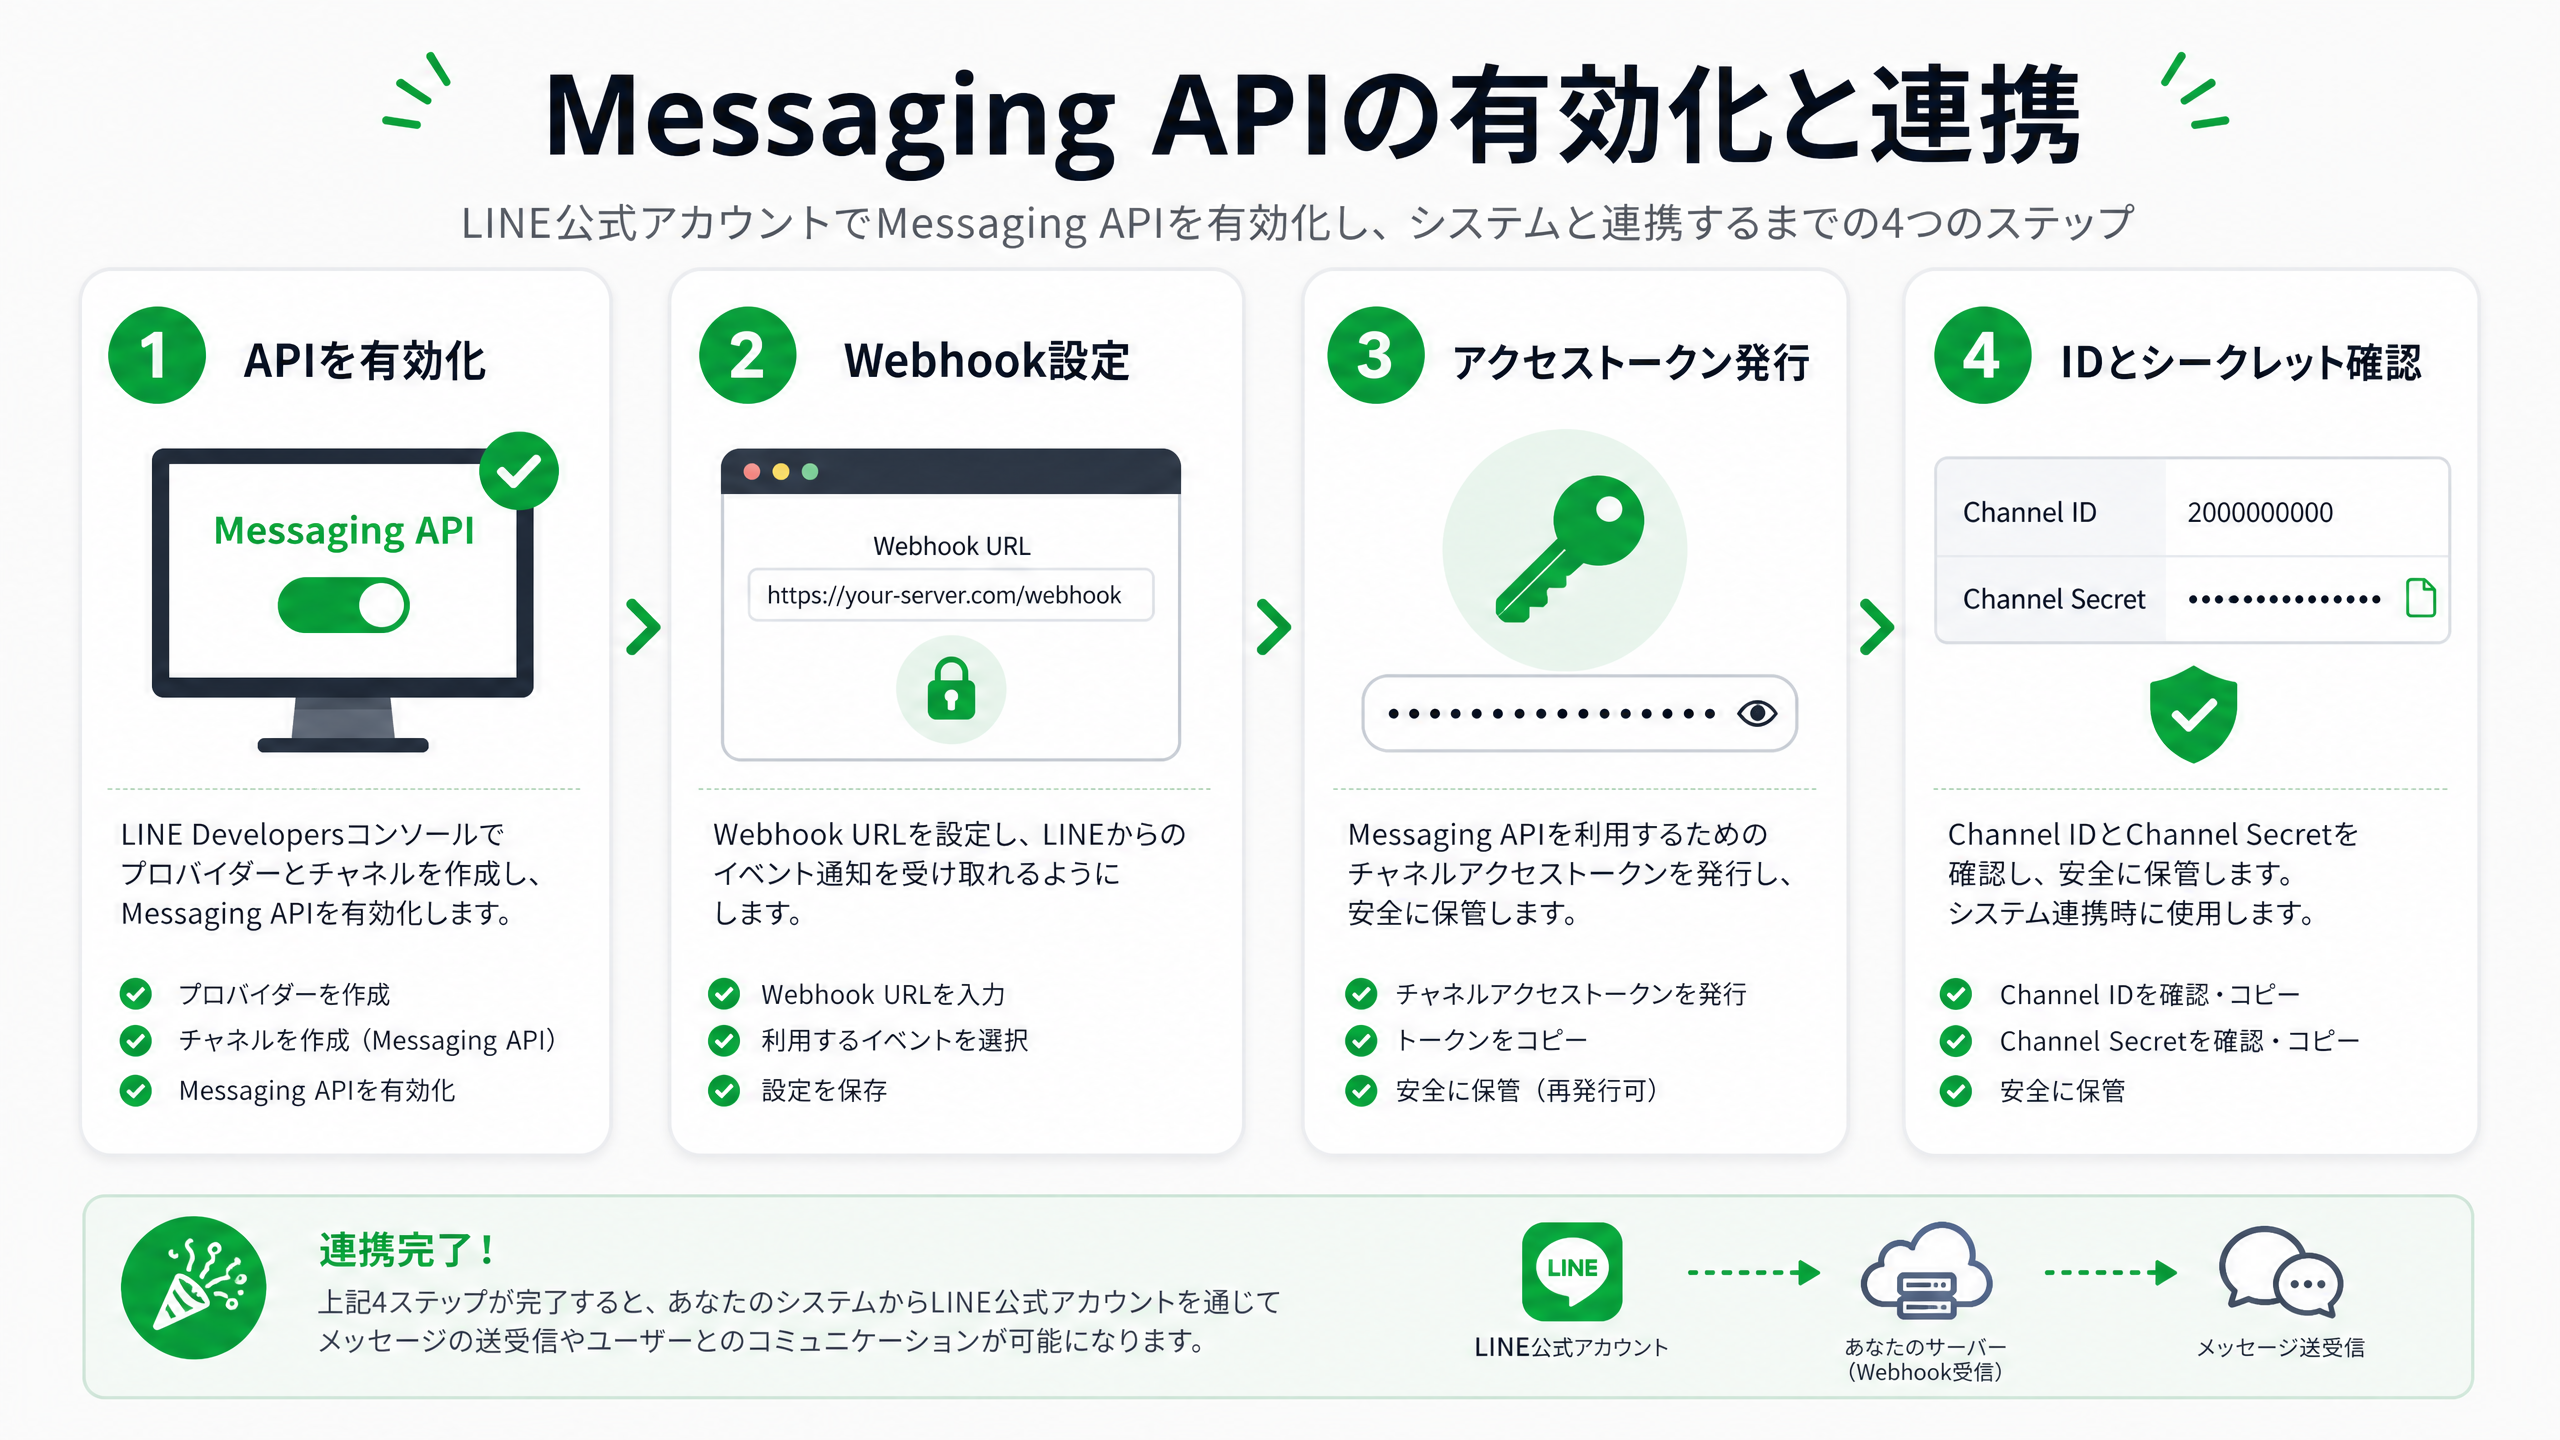 Open the image to enlarge
- Open the Messaging API settings tab for the channel and enable the Messaging API.
- Set a Webhook URL if required.
- In the long-lived channel access token section, select “Issue” and confirm the token.
- Open the basic channel settings and confirm the channel ID and channel secret.
If you get stuck
LINE updates may change settings screens and labels. If you cannot continue, hide all secret information, attach a screen showing the situation, and email support@tagmore.net.